Angular 14 Tutorial & Example — Upload Files with FormData, HttpClient, RxJS, and Material ProgressBar

Angular 14 is released with new features. In this tutorial, we’ll see by example how to upload multiple image files using FormData, HttpClient (for posting multipart/form-data), Angular 14 and TypeScript.
We’ll see how to use Angular Material ProgressBar for indicating activity when uploading images and how to use HttpClient along with with the RxJS map() method to listen for file upload progress events.
By following this tutorial, you’ll learn the following skills:
- How to upload single and multiple image files in TypeScript and Angular 14
- How to set up HttpClient in your Angular 14 project,
- How to use HttpClient to send POST requests with multipart/form-data,
- How to listen for file upload progress events using HttpClient,
- How to use FormData to create forms in TypeScript,
- How to use Angular Material’ MatProgressBar component to indicate the percentage of file upload in real-time.
- How to use various RxJS operators like map() and catchError().
These are the steps of this tutorial:
- Step 1 — Setting up Angular CLI 14
- Step 2 — Initializing a New Angular 14 Project
- Step 3 — Setting up Angular HttpClient
- Step 4 — Creating Angular Components
- Step 5 — Adding Angular Routing
- Step 6 — Setting up Angular Material
- Step 7 — Creating an Angular File Upload Service
- Step 8 — Creating a File Upload UI with Material Icon, Card, Button, and ProgressBar Components
We’ll not create a server application for file upload since this is out of the scope of this tutorial. Instead, we’ll be using https://file.io a service for uploading and sharing files online.
Let’s get started with a quick introduction to FormData.
What’s FormData?
FormData is a data structure that can be used to store key-value pairs. It’s designed for holding form data and can be used with JavaScript to build an object which corresponds to an HTML form. It’s mostly useful when you need to send form data to RESTful API endpoints, for example, to upload single or multiple files using the XMLHttpRequest interface or any HTTP client library.
You can create a FormData object by instantiating the FormData interface using the new operator as follows:
const formData = new FormData()
The formData reference refers to an instance of FormData. You can call many methods on the object to add and work with pairs of data. Each pair has a key and value.
These are the available methods on FormData objects:
append(): used to append a key-value pair to the object. If the key already exists, the value is appended to the original value for that key,delete(): used to deletes a key-value pair,entries(): returns an Iterator object that you can use to loop through the list the key value pairs in the object,get(): used to return the value for a key. If multiple values are appended, it returns the first value,getAll(): used to return all the values for a specified key,has(): used to check if there’s a key,keys(): returns an Iterator object which you can use to list the available keys in the object,set(): used to add a value to the object, with the specified key. This is going to replace the value if a key already exists,values(): returns an Iterator object for the values of the FormData object.
Now, let’s proceed to our tutorial starting with the prerequisites.
Prerequisites
In this tutorial, we’ll create an example application with Angular 14, so you will need to have a few prerequisites:
- A development environment with Node.JS and NPM installed
- Basic knowledge of TypeScript. Particularly the familiarity with Object-Oriented concepts such as TypeScript classes and decorators.
- A local development machine with Node 8.9+, together with NPM 5.5.1+ installed. Node is required by the Angular CLI like the most frontend tools nowadays. You can simply go to the download page of the official website and download the binaries for your operating system. You can also refer to your specific system instructions for how to install Node using a package manager. The recommended way though is using NVM — Node Version Manager — a POSIX-compliant bash script to manage multiple active Node.js versions.
Note: If you don’t want to install a local environment for Angular development but still want to try the code in this tutorial, you can use Stackblitz, an online IDE for frontend development that you can use to create an Angular project compatible with Angular CLI.
Angular 14 Tutorial, Step 1 — Setting up Angular CLI
In this step, we’ll install the latest Angular CLI 14 version (at the time of writing this tutorial).
Note: These instructions are also valid for Angular 10.
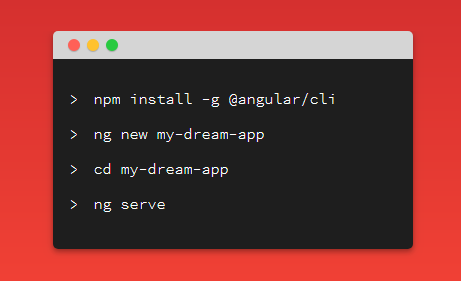
Angular CLI is the official tool for initializing and working with Angular projects. To install it, open a new command-line interface and run the following command:
$ npm install -g @angular/cli
At the time of writing this tutorial, angular/cli v14 will be installed on your system.
In the next step, we’ll learn how to initialize a new example project from the terminal.
Step 2 — Initializing a New Angular 14 Project
After installing Angular CLI, let’s create our example project. Head back to your terminal and run the following commands:
$ cd ~
$ ng new angular-upload-example
The CLI will ask you a couple of questions — If Would you like to add Angular routing? Type y for Yes and Which stylesheet format would you like to use? Choose CSS.
This will instruct the CLI to automatically set up routing in our project so we’ll only need to add the routes for our components to implement navigation in our application.
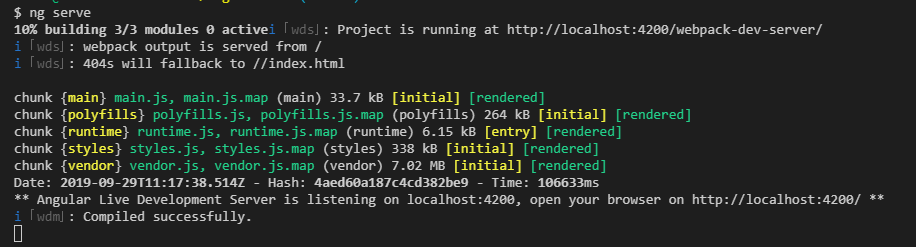
Next, navigate to your project’s folder and run the local development server using the following commands:
$ cd angular-upload-example
$ ng serve
A local development server will start listening on the http://localhost:4200/ address.
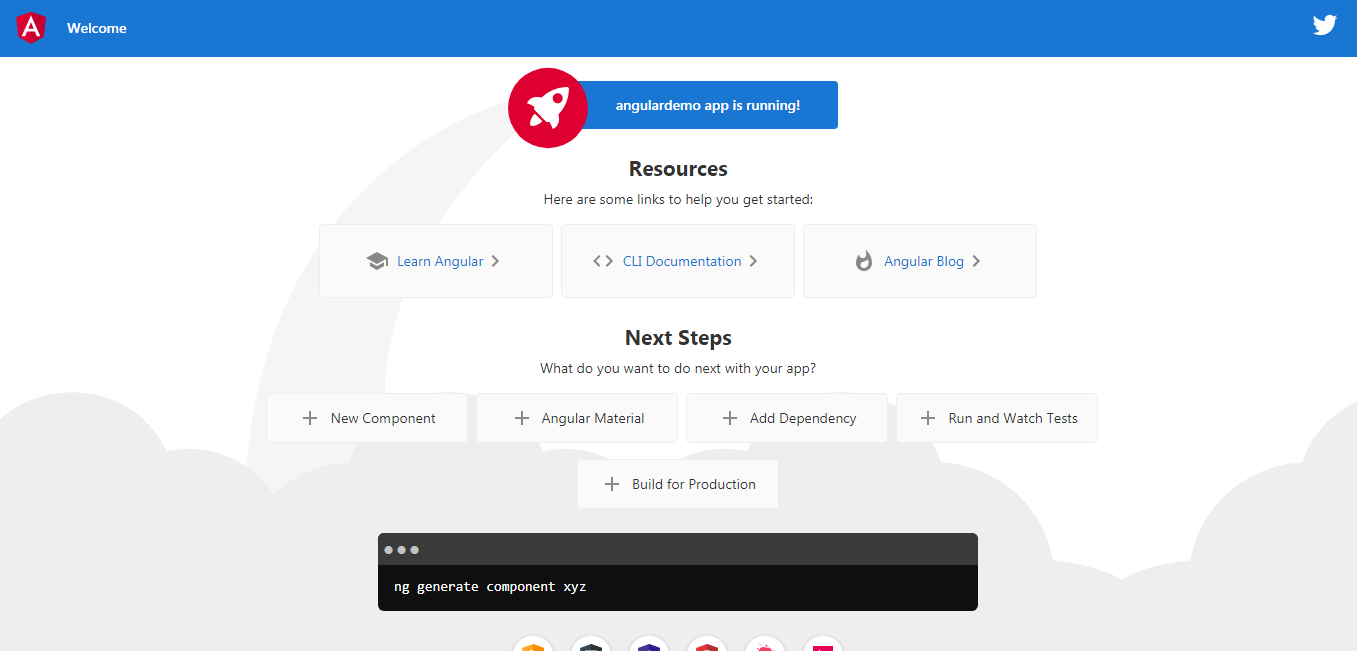
Open your web browser and navigate to the http://localhost:4200/ address to see your app up and running. This is a screenshot at this point:
You should now leave the development server running and start a new terminal for running the CLI commands of the next steps.
Step 3 — Setting up Angular HttpClient
After initializing our Angular project using Angular CLI, let’s continue by setting up HttpClientiin our example.
HttpClient lives in a separate Angular module, so we’ll need to import it in our main application module before we can use it.
Open your example project with a code editor or IDE. I’ll be using Visual Studio Code.
Next, open the src/app/app.module.ts file, import HttpClientModule and add it to the imports array of the module as follows:
import { BrowserModule } from '@angular/platform-browser';
import { NgModule } from '@angular/core';
import { AppRoutingModule } from './app-routing.module';
import { AppComponent } from './app.component';
import { HttpClientModule } from '@angular/common/http';

@NgModule({
  declarations: [
    AppComponent,
  ],
  imports: [
    BrowserModule,
    AppRoutingModule,
    HttpClientModule
  ],
  providers: [],
  bootstrap: [AppComponent]
})
export class AppModule { }
That’s all, we are now ready to use the HttpClient service in our project but first we need to create two, home and about, components of our app.
Step 4 — Creating Angular Components
After setting up Angular HttpClient, let’s create the Angular components that control our application UI.
Head back to a new terminal and run the following commands:
$ cd ~/angular-upload-example
$ ng generate component home
The CLI created four files for the component and added it to the declarations array in the src/app/app.module.ts file.
Next, let’s create the about component using the following command:
$ ng generate component about
Next, open the src/app/about/about.component.html and add the following code:
<p style="padding: 13px;">
   Angular 8 tutorial & example —  How to upload multiple image files with FormData & HttpClient
</p>
We’ll leave the home component for the next steps.
Step 5 — Adding Angular Routing
After creating the Angular components, let’s add them to the Router.
Go to the src/app/app-routing.module.ts file, that routing configuration, and import the components then add the following routes:
import { NgModule } from '@angular/core';
import { Routes, RouterModule } from '@angular/router';
import { HomeComponent } from './home/home.component';
import { AboutComponent } from './about/about.component';

const routes: Routes = [
  { path: '', redirectTo: 'home', pathMatch: 'full'},
  { path: 'home', component: HomeComponent },
  { path: 'about', component: AboutComponent },
];

@NgModule({
  imports: [RouterModule.forRoot(routes)],
  exports: [RouterModule]
})
export class AppRoutingModule { }
Step 6 — Setting up Angular Material
After adding routing to the various components of our application, let’s see how to add Angular Material to style the UI.
Angular Material provides Material Design components that allow developers to create professional UIs.
Go to your terminal, and run the following command from the root folder of your project:
$ ng add @angular/material
You’ll be prompted to choose a theme, let’s go with Indigo/Pink.
For the other questions — Set up HammerJS for gesture recognition? and Set up browser animations for Angular Material? Press Enter in your keyboard to choose the default answers.
Next, open the src/styles.css file and add a theme:
@import "~@angular/material/prebuilt-themes/indigo-pink.css";
Each Angular Material component exists in its separate module that you need to import before you can use the component. Open the src/app/app.module.ts file and add the following imports:
import { MatToolbarModule,
  MatIconModule,
  MatCardModule,
  MatButtonModule,
  MatProgressBarModule } from '@angular/material';
These are the modules we imported:
- MatIcon that makes it easy to use vector-based icons in your app.
- MatToolbar that contains a container for headers, titles, or actions.
- MatCard that contains a content container for text, photos, and actions in the context of a single subject.
- MatButton that contains a native
<button>or<a>element enhanced with Material Design styling and ink ripples. - MatProgressBar that contains a horizontal progress-bar for indicating progress and activity.
Next, you need to add these modules in the imports array:
@NgModule({
  declarations: [
    AppComponent,
    HomeComponent,
    AboutComponent
  ],
  imports: [
    BrowserModule,
    AppRoutingModule,
    HttpClientModule,
    BrowserAnimationsModule,
    MatToolbarModule,
    MatIconModule,
    MatButtonModule,
    MatCardModule,
    MatProgressBarModule
  ],
  providers: [],
  bootstrap: [AppComponent]
})
export class AppModule { }
Next, let’s add a toolbar to our application. Go to the src/app/app.component.html file and add the following code:
<mat-toolbar color="primary">
  <h1>
    ngImageUpload
  </h1>
  <button mat-button routerLink="/">Home</button>
  <button mat-button routerLink="/about">About</button>
</mat-toolbar>
<router-outlet></router-outlet>
We created the shell of our application containing a top bar with two navigation buttons for the home and about components.
As a recap of our tutorial to this point:
- We have installed Angular CLI, initialized a new project and created a couple of components with routing,
- We have configured HttpClient and Angular Material in our project and added an app shell that contains a topbar and navigation.
Step 7 — Creating an Angular File Upload Service
Now, let’s create an Angular service that encapsulates the code for image file uploading in our project.
Head back to your terminal and run the following command to generate a new service:
$ ng generate service upload
Next, open the src/app/upload.service.ts file and start by adding these imports:
import { HttpClient, HttpEvent, HttpErrorResponse, HttpEventType } from  '@angular/common/http';
import { map } from  'rxjs/operators';
Next, inject HttpClient and define the SERVER_URL variable which will contain the address of the file upload server:
@Injectable({
  providedIn: 'root'
})
export class UploadService {
	SERVER_URL: string = "https://file.io/";
	constructor(private httpClient: HttpClient) { }
Next, add the upload() method which simply calls the post() method of HttpClient to send an HTTP POST request with form data to the file upload server:
public upload(formData) {

	return this.httpClient.post<any>(this.SERVER_URL, formData, {
      reportProgress: true,
      observe: 'events'
    });
}
Step 9 — Creating a File Upload UI with Material Icon, Card, Button, and ProgressBar Components
After creating the service that takes care of sending FormData to the file upload server, let’s now create the UI for uploading images to the server.
Open the src/app/home/home.component.ts file, and start by adding the following imports:
import { Component, OnInit, ViewChild, ElementRef  } from '@angular/core';
import { HttpEventType, HttpErrorResponse } from '@angular/common/http';
import { of } from 'rxjs';
import { catchError, map } from 'rxjs/operators';
import { UploadService } from  '../upload.service';
Next, define the fileUpload and files variables and inject UploadService as follows:
@Component({
  selector: 'app-home',
  templateUrl: './home.component.html',
  styleUrls: ['./home.component.css']
})
export class HomeComponent implements OnInit {
    @ViewChild("fileUpload", {static: false}) fileUpload: ElementRef;files  = [];
    constructor(private uploadService: UploadService) { }
Next, define the uploadFile() method:
uploadFile(file) {
    const formData = new FormData();
    formData.append('file', file.data);
    file.inProgress = true;
    this.uploadService.upload(formData).pipe(
      map(event => {
        switch (event.type) {
          case HttpEventType.UploadProgress:
            file.progress = Math.round(event.loaded * 100 / event.total);
            break;
          case HttpEventType.Response:
            return event;
        }
      }),
      catchError((error: HttpErrorResponse) => {
        file.inProgress = false;
        return of(`${file.data.name} upload failed.`);
      })).subscribe((event: any) => {
        if (typeof (event) === 'object') {
          console.log(event.body);
        }
      });
  }
We created an instance of FormData and appended the file to a field named file. The name of this key needs to be where your server expects to find the file other
wise the server will not be able to extract the file.
Next, we sent the form data to the server by invoking the Upload() method of UploadService.
Next, define the uploadFiles() method which can be used to upload multiple image files:
private uploadFiles() {
    this.fileUpload.nativeElement.value = '';
    this.files.forEach(file => {
      this.uploadFile(file);
    });
}
Next, define the onClick() method:
onClick() {
    const fileUpload = this.fileUpload.nativeElement;fileUpload.onchange = () => {
    for (let index = 0; index < fileUpload.files.length; index++)
    {
     const file = fileUpload.files[index];
     this.files.push({ data: file, inProgress: false, progress: 0});
    }
      this.uploadFiles();
    };
    fileUpload.click();
}
Next, we need to create the HTML template of our image upload UI. Open the src/app/home/home.component.html file and add the following content:
<div style="text-align:center; margin-top: 100px; "><mat-card style="margin-top:10px; width: 50%;">
        <mat-card-content>
            <ul>
                <li *ngFor="let file of files">
                    <mat-progress-bar [value]="file.progress"></mat-progress-bar>
                    <span id="file-label">

                    </span>
                </li>
            </ul>
        </mat-card-content>
        <mat-card-actions>
            <button mat-button color="warn" (click)="onClick()">
                <mat-icon>file_upload</mat-icon>
                Upload
            </button>
        </mat-card-actions>
    </mat-card><input type="file" #fileUpload id="fileUpload" name="fileUpload" multiple="multiple" accept="image/*" style="display:none;" /></div>
Next, open the src/app/home/home.component.css file and add the following CSS code:
ul,
li {
      margin: 0;
      padding: 0;
      list-style: none;
}
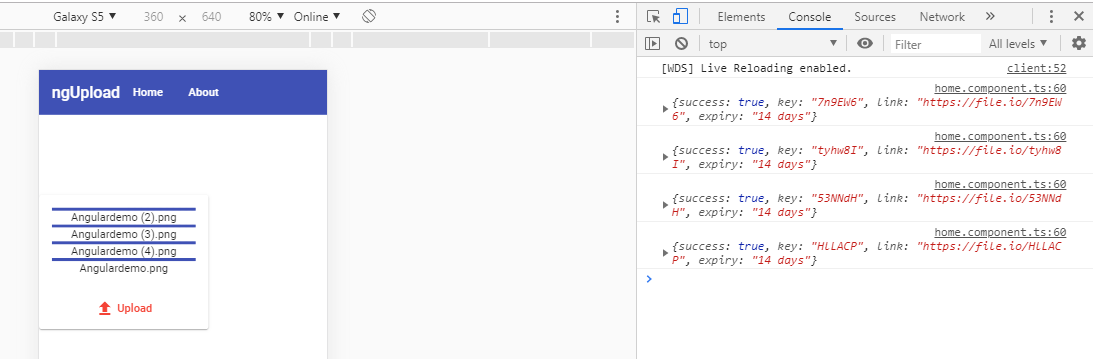
This is a screenshot of our application when uploading four images files:
Conclusion
As a wrap-up of our tutorial, we’ve seen how to upload single and multiple image files to a server using HttpClient to send POST requests with FormData. We’ve used various Angular 14 Material components, such as MatCard, MatButton, MatIcon, and MatProgressBar, to create the UI layout.